So, you've got an asphalt driveway or maybe a small parking pad, and you're thinking about putting down some fresh stripes. Maybe it's for parking, maybe it's a basketball court, or maybe you just want to tidy things up. It's a common thought, especially for folks who like to tackle projects themselves. But before you grab a can of spray paint and a string line, let's talk about what's involved and what you can realistically do yourself versus when you really ought to call in a professional.
Before You Start: Planning and Prep
First off, what are you striping? A simple straight line for a parking spot? Or something more complex, like a handicap space or multiple parking stalls? The complexity of the job is the biggest factor in deciding if it's a DIY project. For a single, straight line or two, you might be able to manage. Anything more involved, and you're probably looking at a professional job.
You'll need to clean the surface thoroughly. I'm talking about sweeping, blowing, and even pressure washing if there's a lot of dirt, grime, or mildew. Down here in St. James City, with all the humidity and occasional heavy rains, mildew can be a real problem. If your asphalt isn't clean, that paint isn't going to stick, and all your hard work will wash away with the next downpour. Make sure the surface is completely dry before you even think about painting.
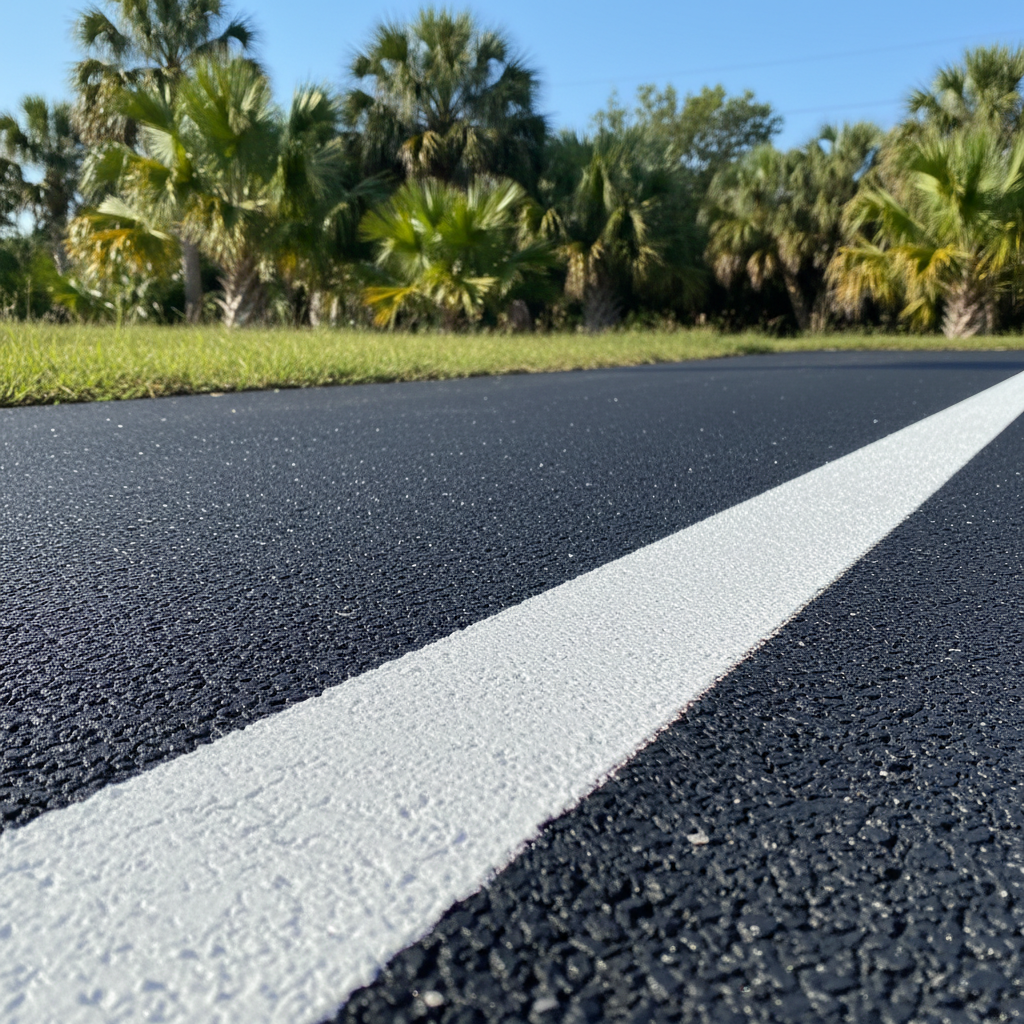
Next, get your measurements right. This is crucial. Use a good tape measure, chalk, and a straightedge. For parking spaces, standard width is typically 9 to 10 feet, and length is around 18 to 20 feet. If you're doing something like a basketball court, you'll need official dimensions. Don't just eyeball it; you'll regret it later when your lines are crooked or uneven.
Choosing Your Materials: Paint and Tools
This isn't just any old paint. You need specialized asphalt striping paint. It's designed to adhere to asphalt, withstand vehicle traffic, and resist fading from the sun and elements. Regular house paint won't cut it; it'll flake and peel in no time. You can find aerosol cans for small jobs or larger containers for use with a striping machine.
For tools, if you're doing a small DIY job, you'll want:
- A long tape measure and chalk line.
- A good, stiff broom and leaf blower for cleaning.
- Painter's tape or masking tape for crisp edges.
- A straightedge, like a long piece of lumber or a metal ruler.
- Kneepads, because you'll be on the ground a lot.
- Safety glasses and gloves.
If you're considering a striping machine, even a small, manual push-style one, it's a step up in investment and skill. These machines give you much straighter, more consistent lines, but they take some practice to operate smoothly. For anything beyond a couple of simple lines, a machine is almost a necessity for a professional look.
During the Project: Laying Down the Lines
Once everything is clean, dry, and measured, it's time to mark. Use chalk to snap your lines. This gives you a guide that's easy to adjust if you make a mistake. If you're using painter's tape, apply it carefully along the chalk lines to create a crisp edge. This is where patience pays off. Any wobbles here will show up in your finished stripe.
When you're ready to paint, follow the manufacturer's instructions on the paint can. If you're using aerosol cans, keep a consistent distance and speed to avoid drips and uneven coverage. Multiple thin coats are always better than one thick coat that might glob up or take forever to dry. If you're using a striping machine, practice on a scrap piece of cardboard or an inconspicuous area first to get a feel for it. Consistency is key.
Always check the weather forecast. You don't want rain washing away your fresh paint. And here in Southwest Florida, that can pop up unexpectedly. Give the paint plenty of time to dry before driving on it or exposing it to heavy foot traffic. We're talking hours, sometimes even a full day, depending on humidity and temperature.
After the Paint Dries: What to Expect and When to Call a Pro
Once your lines are dry, you'll have a fresh, clean look. But how long will it last? Even with good quality paint, DIY stripes on a heavily used driveway might only last a year or two before they start to fade or wear. Professional-grade paints and application methods, like those we use at Top Notch Asphalt Solutions, are designed for much longer durability, often lasting several years.
So, when should you just skip the DIY and call someone like me? If you need:
- Multiple parking spaces, especially if they need to be angled or include arrows.
- Handicap parking symbols, which have specific dimensions and legal requirements.
- Fire lanes or other regulatory markings.
- Large areas like a community parking lot or a commercial property.
- If your asphalt surface is in rough shape — cracked, potholed, or severely faded — you'll need repairs or even a fresh sealcoat before striping. Painting over a bad surface is just a waste of time and money.
For a small, straightforward job, a homeowner can definitely tackle it. But for anything that requires precision, durability, or adherence to specific codes, you're better off letting the pros handle it. We've got the specialized equipment, the right paints, and the experience to get it done efficiently and effectively, saving you headaches and ensuring a long-lasting result.
``` faction:contractor```json {